Audio Editing, MIDI & Exports
Use this guide when you already have a completed song and need to edit its waveform, work with separated parts, convert detected instruments to MIDI, or download a production file. These actions start from the song row, but they create different kinds of results.
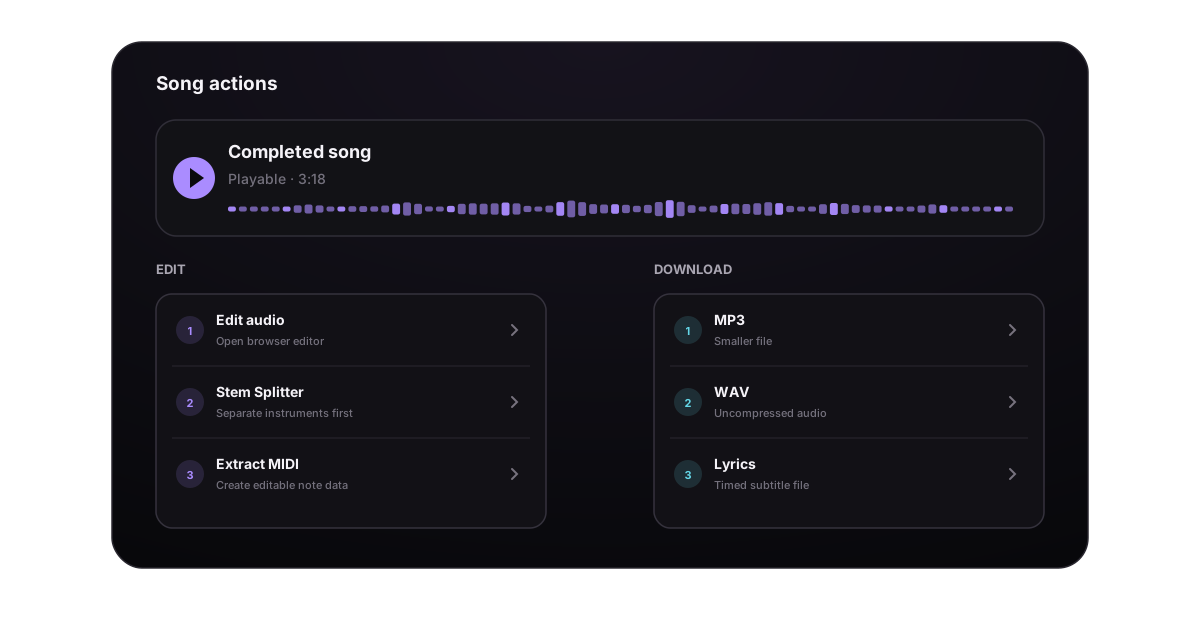
Choose the result before choosing the tool
| What you need | Where to start | What you get |
|---|---|---|
| A quick MP3 copy | Download → Download MP3 | The completed song as a compressed audio file |
| A higher-quality audio file | Download → Download WAV | A WAV prepared from a compatible song source |
| Timed lyrics for captions | Download → Download Lyrics (.srt) | A subtitle file with lyric timing |
| Separate vocal and instrumental files | Edit → Voice Remover | Two-track or multitrack separation results |
| More instrument parts for mixing | Edit → Stem Splitter | Up to the detected stem types for a compatible song |
| A browser-based waveform or multitrack edit | Edit → AudioMass – Audio Editor | An editable session and a stereo WAV export |
| Editable note data | Edit → Extract MIDI | One MIDI file per detected instrument, plus a combined multitrack MIDI when available |
| A newly generated version of one time range | Edit → Edit song section | A new song result rather than a locally edited file |
Downloading, separating, MIDI extraction, and section replacement are separate workflows. A WAV does not contain isolated stems, and MIDI does not preserve the original singer, instrument tone, mix, or effects.
Start from the correct song version
- Open Create or Library and find the completed song.
- Play the row before opening More actions, especially when several versions share a title.
- Expand Edit for AudioMass, Stem Splitter, Extract MIDI, or Edit song section.
- Expand Download for MP3, WAV, lyrics SRT, or the cover image.
An action can be disabled even when a song is playable. Some tools need both the final audio and compatible source identifiers. If a result came from an unsupported source, use the options that remain available instead of repeatedly refreshing the page.
Edit a song in AudioMass
AudioMass runs in the browser and is best used on a tablet or computer. It can load a completed song, a vocal-removal result, or a completed set of stems.
Load audio from a song row
- Open More actions → Edit → AudioMass – Audio Editor.
- Wait for the editor and waveform to load.
- Confirm the title and duration before making a selection.
Starting from a completed Stem Splitter result can load the available stems into a multitrack session. Starting from a normal song loads the song as one waveform. If split files are no longer available, the editor may fall back to the source song.
Load a song from inside the editor
- Open AudioMass – Audio Editor.
- Select Sources to show the Source Library.
- Choose a playable song from Recent generated songs.
- Select Load into editor.
- Wait for the confirmation that the song has loaded.
The source list is hidden while multitrack mode is open. Turn off multitrack mode before choosing another single-song source.
Select and review a time range
Drag across the waveform to create a selection. The transport bar shows the selection start, end, and duration. Use Clear selection when you want to work on the full file or choose a different range.
Before applying an effect, play from just before the selection and continue just after it. This catches clicks, clipped words, abrupt fades, and edits made one beat too early or late.
Use the transport and effect controls
| Control | What it does | Good use |
|---|---|---|
| Play / Pause / Stop | Reviews the current audio | Compare before and after every important edit |
| Loop | Repeats the active playback range | Fine-tune a short transition or edit boundary |
| Seek to start / end | Jumps to either edge of the file | Check unwanted silence and cutoffs |
| Fade in / Fade out | Gradually changes level in the selected area | Smooth an entrance, exit, or edit boundary |
| Normalize | Adjusts the selected material toward a consistent level | Correct an obviously quiet region before final review |
| Gain | Raises or lowers the selected audio | Balance a section without changing the rest |
| Reverse | Reverses the selected audio | Create a transition or sound-design effect |
| Denoise | Reduces steady background noise in the selection | Clean a quiet spoken or exposed passage |
| Multitrack | Opens the multitrack workspace | Balance and arrange separated stems together |
Use one effect at a time and listen immediately. Heavy denoise, repeated normalization, or large gain changes can make artifacts more obvious. Keep the original song available until the export has been checked.
Export the edited mix
Select Export WAV in the upper-right corner. The current editor export is a stereo, 16-bit WAV. This is a new local download; it does not replace the source song in your library.
After export, reopen the file and check:
- the beginning and ending are not cut off;
- the duration matches the intended edit;
- left and right channels play correctly;
- edits do not create clicks or sudden level jumps;
- the file opens in the next editor or video timeline.
Extract MIDI from a song
MIDI extraction follows a two-step path because the system first needs instrument stems. It is available from a compatible completed song.
- Open More actions → Edit → Extract MIDI.
- The Voice Remover & Stem Splitter page opens with your song and Full Stem Split selected.
- If stems already exist, their results appear directly. An active task resumes showing its current status.
- If stems do not exist, review the displayed credit cost and select Separate Audio.
- You can leave the page while separation runs and return to the same song or its history entry later.
- In MIDI Extraction, select Extract MIDI.
- Wait for the instrument analysis to complete.
The current displayed costs are 20 credits for Stem Splitter when it has not already been completed and 4 credits for MIDI extraction. A cached completed result does not start the same processing step again. Always use the live credit badges as the final price.
Download MIDI results
Each detected instrument appears with its note count and a .mid download button. Download a single instrument when you want to replace or edit only that part. When more than one track is available, Download multitrack (.mid) places the detected instruments in separate tracks inside one MIDI file.
MIDI stores note instructions: which note to play, when it starts, how long it lasts, and how strongly it is played. Your audio editing or music production program chooses the instrument sound. Import the file, assign instruments, set the project speed if needed, and compare it with the original audio.
What to check after MIDI extraction
- Notes begin at the same moments as the original rhythm.
- Long notes do not end too early or overlap incorrectly.
- The detected instrument label matches the musical part.
- Chords contain the expected notes rather than duplicated or missing tones.
- Drum-like sounds, heavily altered sounds, strong echoes, or densely layered passages are corrected manually if needed.
MIDI extraction is a starting point for arrangement, writing down the notes, and replacing instrument sounds. It does not make a perfect note-for-note copy of the recording.
Download song files
Open the song row's Download section and choose the file that fits the next step.
| Download | Availability | Notes |
|---|---|---|
| MP3 | Completed song with audio | Fast general-purpose download |
| WAV | Completed compatible source with required identifiers | The preparation step can take time; the final download currently uses 1 credit |
| Lyrics (.srt) | Compatible completed song with timed lyric source data | The first uncached preparation currently uses 1 credit; instrumental or unaligned songs may have no result |
| Cover Image | A current cover image exists | Downloads artwork only; it does not add song details inside the audio file |
| Stems | A separation task completed | Download from the separation result, individually or as the offered collection |
| MIDI | MIDI extraction completed | Download from the MIDI section, not the song's basic download menu |
If WAV preparation or a paid download fails, follow the message shown in the dialog before trying again. Processing failures use the normal refund path. A completed preparation does not mean every future download is free, so review the live credit amount before selecting the final download button.
Keep exports organized
Use a filename pattern that clearly separates the original from later edited files:
Song Title - original.mp3
Song Title - edited.wav
Song Title - Vocals.mp3
Song Title - Bass.mid
Song Title - MIDI Stems.mid
Song Title - lyrics.srt
Keep the untouched song, note which version produced the stems or MIDI, and test every important export before deleting any temporary result. Stem links can expire, so download required separation files promptly.
For a full comparison of separation modes, continue with Vocal Remover & Stem Separation. For local regeneration rather than waveform editing, see Replace a Song Section.
